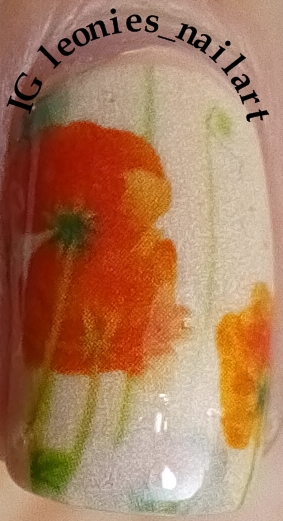
Nailcollage

Showing posts with label decals. Show all posts

Sunday, November 8, 2015

Dandelion Waterdecals, Review for Born Pretty Store


For today I have another review for a Born Pretty Store-product and that is 'Dandelion Waterdecals', productnumber #21777

You can get them HERE or you can go to the Born Pretty Store and search for #21777

To show you how beautiful these waterdecals are, I've made a design in which I also used BP-069 stampingplate, you can find that here, productnumber #20042.
The image that i used is the little girl blowing at the dandelions and for my other 3 fingers I used the waterdecals.

These decals are so easy to use: just cut the decals that you want from the sheet, put them in water for 10-20 seconds, slide the decals of the sheet and place them on your nail. Dab the excess water of and you are ready!
The decals are so superthin, that you can't see them lying on you nail and that is so important to me. And in that, these decals succeed!

For the background I used BPL-013, which you can find here and a lot of colors to make a multicolored gradient.


I really love these decals and the stampingplates I've used for this design.
The next photo's are close-ups so you can even see the images and decals better.

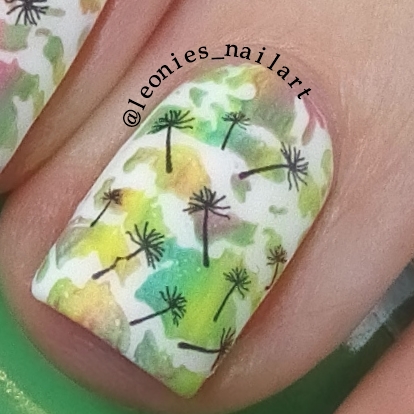


What do you think of these decals? Do you love them as much as I do??

If you want to buy them, go to  the website and search for productnumber #21777 and they are on sale now!
If the sale is over or you see other products (like the stampingplates: here and here) that you like, you can use my code LWGK31 to get 10% of your order.


Sunday, July 5, 2015

Full Nail Flower Waterdecals, review for Born Pretty Store


Yesterday i made a pictorial-blog about how to apply the Born Pretty Store full nail waterdecals and today i will be giving my review about them.
You can find them on THIS website and search for itemnumber #20316 or you can click HERE for a direct link. They are on sale now with a 25% discount!


There are 4 different patterns on the sheet you get and the images are all different, but all really cute!
There are flower-decals and decals where you see a girl/lady on a shopping trip.


These are the decals with a image of 2 girls playing outside


And here you have a beach and forest image.
All the images are very different, so there is something for everyone.


This is the collage of the pictorial how to apply the waterdecals. They are easy to use and give an instant design on your nails.
You can use them on all your nails, or just make an accentnail with them. There is enough to make multiple designs, so it is well worth your money!!


I am really pleased with these waterdecals and highly recommend them!
You can find them on THIS website and search for itemnumber #20316 or you can click HERE for a direct link.
If you use my code LWGK31 you get a 10% discount (not on products that are for sale)

What do you think?


Saturday, July 4, 2015

Full Nail Flower Waterdecals - Pictorial


For today I have a pictorial for these super cute full nail Flower waterdecals.
The Born Pretty Store was kind enough to send me these to try and review. 
The review will be my next blogpost.


The waterdecals are easy to use and you have an instant great result without much problems.
I decided to go with the flowers decals and I cut the decal in 5 pieces. There are 2 of the same decals, so enough for 2 full hands or numerous accentnails.
First I painted my nails light Salmonpink, but white would also be a great choice.
When my polish was completely dry, I pulled of the plastic layer. 
Don't forget to do this, or your decals sticks to the plastic and will not be able to transfer to your nails. 
I've learnt that the hard way ;)


Take a tweezer and place the cut decals in water, one at a time.
Wait for a couple of seconds (10-20) and check if the decals slides off the paper backing.


It should look like this.


Transfer the decal to your nail and wiggle until the decals is in the right place. As long as your nail and/or decals are wet, it will be able to move on its place.
Cut the excess decal with a little scissor. 
I also cut the end of the nail. I see a lot of people file it off, but I noticed that when I cut it real close, the topcoat will shrink the decals a little bit and that is enough to smooth out the end of your nail/waterdecal. 


This is how it should look like when you've done one nail with topcoat.
I really like how it came out! 
The decals are easy to use and with 4 different patterns, you can find what you like!


And these are the 4 waterdecals you can choose from from the Born Pretty Store.
It is item #20316 and you can find it HERE 
If you use my discountcode  LWGK31, you get 10% of your purchase with BornPrettyStore.


What do you think?


Sunday, June 21, 2015

Seashells and Starfish nailstickers, review for Born Pretty Store


For today's blog, I have a review of the cute silver seashell and starfish stickers from BornPrettyStore.com 
You can choose roses, seashells or seashells and starfish in white, black, gold or silver.
I choose silver, because I think it fits really well with the blue of the ocean.


I started with a white basecoat to make the colors pop. Then I tore a piece of makeup sponge and dabbed that in a teal nailpolish and then applied that on my nails. Then I used a light teal and dabbed that on so there would be some dimension. I also used some white nailpolish, because I thought it was to blue.....


The next step is to apply the stickers. There are 4 kinds of stickers I used: big and little seashells and big and little starfishes. 
It was easy to get the stickers of the plastic and even easier to apply on my nails.
I usually don't use nailstickers, because they are thick and you can see them, but these are thinner then I'm used to, so a good coat of topcoat and it is almost not visible.
Because I wanted to put on some sand for a realistic look, I applied the topcoat one finger at a time and then added the sand.
The sand is in a little container, so I dipped in the tip of my nail to get the sand where I wanted it to be.
With a fanbrush I removed the excess sand and went on to the next nail.


And this is the endresult!

I love them so much!!! 
The silver stickers give this design the extra touch that makes the design this nice!
The stickers are easy to use and not as thick as I expected, which is another plus for this item!

They are called 3D Nail Art Stickers Chic Floral Starfish Nail Tips Stamping Decals and are itemnumber#20479 and you can find them HERE 

If you like them as much as I do and want to order them, make sure to use my discount code LWGK31 for a 10% discount on your next purchase with BornPrettyStore.


What do you think? Do you like them as much as I do?


Saturday, June 6, 2015

Stamped Ladybugs over Golden Flowers


For this Ladybug-design I've made a pictorial of all the steps I've made.
And I am back to nubbins, because of a nasty break in my middle-finger. But with this design I don't mind rocking them ;)


First I've painted all my nails with Essence ''Wonder Wow! Man!', a gorgeous golden polish that is opaque in 2 coats.
When the basecolor had dried completely, I started with the first stamping layer.


For the flower-image I used stampingplate JQ-L18 (bought on AliExpress) and Catrice '(S)Wimbleon', a light aqua/teal greenish color, that stamps wonderful!


The nail stamped with the flowers looks like this, after cleanup. I topcoated with Seche Vite, because I mess up my decals a lot, so with a layer of topcoat it is easy to remove the decal or stampingimage.


For the ladybug I use a cute image of a stampingplate by (I think) Shany, but I cannot find the plate anywhere, so I can't tell the plate number.
As you can see, the whole image didn't transfer correctly, but I don't mind, because nobody is perfect ;) Even precious ladybugs.... (or I am just making excuses) 
I've used multiple stampingheads, so I can make more decals at once.


When the black stampingpolish was completely dried, I filled all the body's in with a bright red.(Dashica 'Pure Red' in my case) Because of my multiple stampingheads, I could immediately fill the images with the red, when I finished stamping the ladybugs.
The red took a little more time to dry, but within 10 minutes, I could start with transferring the ladybugs.
Because the images are not to big, I just placed the stampinghead on my nail and the ladybug had no problem being transferred to my nail. (except for the tiny little feet)


I am really pleased with how this design came out and those nubbins.... they will grow and before I know it, I have long(er) nails again. But until that time: #embracetheshorties !